FAQ
-
Yes! COCO 3D supports controllers as well as hand tracking. In fact, you can even use one of each.
-
When you first launch COCO 3D, it should ask you for permission to use your spatial data. While not required, it will allow your sketch Elements to respond to your real world and disappear when they are behind real world objects or surfaces. You can change this permission at any time in the application settings in your headset.
-
The best way to start fresh is to create a new Space. You can find the ‘New Space’ button in the Hamburger Menu.
-
In the Hamburger Menu, there is a list of ‘Nearby Spaces’. When someone else using COCO 3D is nearby and connected to the same local network as you are, their Space will appear in this list. You can click on their space to join them, though you will probably have to calibrate your Spaces!
Check out Using COCO 3D Together for a full guide on connecting, calibrating, and sketching with others!
-
You sure can! Your active hand is the opposite hand of the one you used to open the tool menu. You can switch your primary hand at any time.
-
If your Elements have moved, try re-calibrating to bring them back to the correct location. This can happen when there are connection issues between headsets, or from movement between spatial anchors.
-
Join the COCO 3D Discord to ask questions of the developers and connect with fellow users!
Guides
Elements
Tools
Adjustment Tools
Setup and Calibration
Getting Started
Next, use your free hand to select the tool you want by poking it like a button.
Welcome to COCO 3D! To get started, hold either hand out with your palm face-up. This will bring up the Tool Menu.
We recommend using your non-dominant hand for the menu, so your dominant hand is ready to draw. COCO 3D works ambidextrously, so you can switch hands at any time while using it.
Almost every tool in COCO 3D works with the same action - pinch and drag!
Now you’re ready to sketch!
Elements
Using the Drawing Tool
The drawing tool will create straight lines or freeform curves.
Straight lines snap to Snap Points, while freeform curves do not.
Include measurements for your lines by toggling the Measurement Tool on or off.
Using the Box Tool
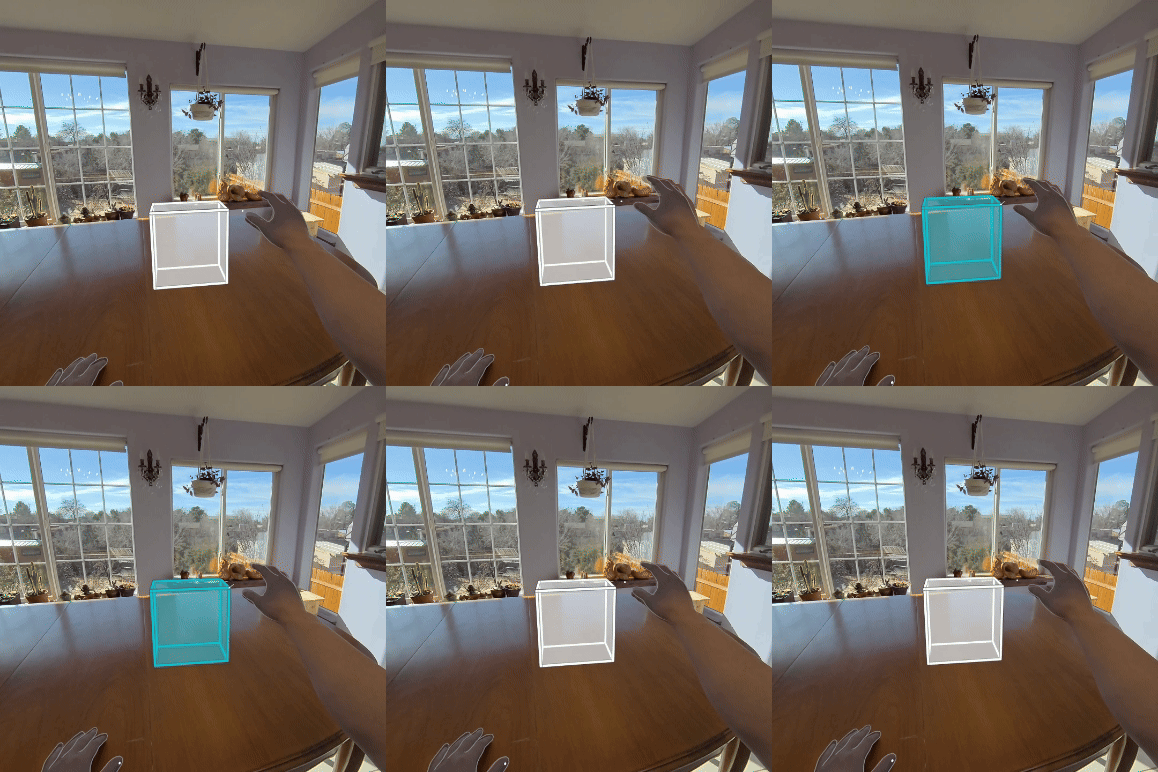
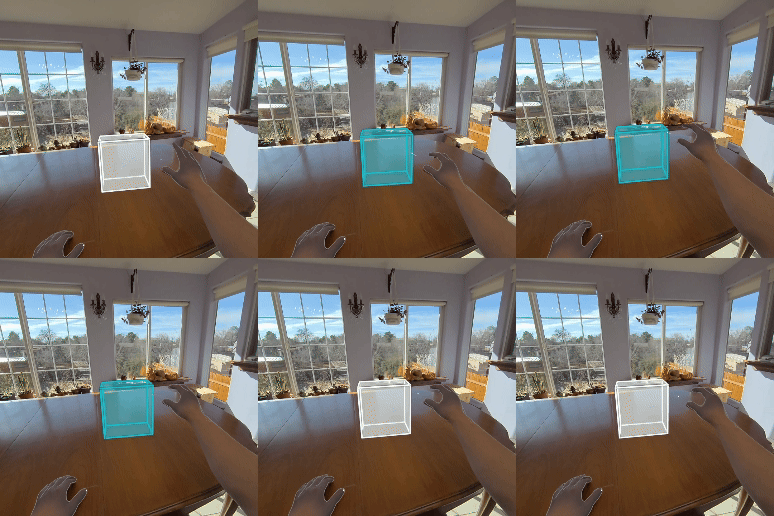
The box tool will create boxes and cubes in one movement.
The corners of boxes snap to Snap Points.
Include measurements with your boxes by toggling the Measurement Tool on or off.
Using the Sphere Tool
The sphere tool will create spheres in one movement.
Include radius and circumference measurements with your spheres by toggling the Measurement Tool on or off.
Adding Measurements
Lines, boxes and spheres can include measurements.
Toggle measurements using the ruler symbol in each tool menu.
For lines, the measurements shown are the total length from end to end, including the curves of a freeform line.
For boxes, the measurements shown are the lengths of the various sides.
For spheres, the measurements shown are radius and circumference.
Tools
Creating Working Planes
Use a Working Plane to align Elements.
Choose the spacing, total width and total height before placing the Working Plane.
Working Planes allow elements to snap to Snap Points for accurate positioning.
Snap Points
Snap Points are features of Elements that an interaction point will automatically snap to within range. They allow you to both select and position Elements accurately!

Sometimes an interaction point can be in range of multiple Snap Points. When this happens, the interaction point will snap to the Snap Point with the fewest degrees of freedom.
For example, a Snap Point on the corner of a box will take priority over a Snap Point on the face of a box.

Snap Points on Elements
Below are the Snap Points on each type of Element. The degrees of freedom for each Snap Point are noted as:
0D - Zero degrees of freedom, a single point
1D - One degree of freedom, a line or an edge
2D - Two degrees of freedom, a surface
3D - Three degrees of freedom, a volume
Lines
0D - The beginning of the line
0D - Halfway along the line
0D - The end of the line
1D - Anywhere along the length of the line
Boxes
0D - Each corner of the box
0D - The center of the box
1D - Each edge of the box
2D - Each face of the box
3D - The interior volume of the box
Freeform Curves
0D - The beginning of the curve
0D - Halfway along the curve
0D - The end of the curve
1D - Anywhere along the length of the curve
Spheres
0D - The center of the sphere
0D - Where each of the rings on the sphere intersect
1D - Along each ring of the sphere
2D - The surface of the sphere
3D - The interior volume of the sphere
Working Planes
Snap Points of Working Planes are special. They exist on the plane itself and also above (and below) the plane. In addition, Snap Points of a Working Plane take priority over Element Snap Points that share the same degrees of freedom, e.g. a 0D Working Plane Snap Point takes priority over a 0D Box Snap Point.
0D - Each intersection
1D - Each edge
2D - Each sub-plane
Grouping/Ungrouping Elements
Elements can be organized into groups. Groups can be moved or manipulated like they are a single Element.
Groups can be layered, meaning a group can contain smaller groups, which may in turn have groups of their own.
Simply ungroup the collection to retrieve an individual Element.
Moving Elements
The Move Tool is an option of the Adjust menu.
When activated, a small interaction point will appear near each hand for attaching to Snap Points. Pinching grabs an Element, allowing you to move it.
The Move Tool allows you to use both hands at once to rotate the Element.
When moving an Element, the interaction points will continue to react to Snap Points. Note, the Element will snap from the point that you grabbed it. For example, grab a box at the corner to use that corner for snapping.
Use the Gimbal for more precise movement and rotation. To bring up the Gimbal, do a quick pinch on a Element. The Gimbal will appear where the Element was pinched. Grab the center of the Gimbal to translate, or use the rings to rotate.
Note, the Gimbal doesn’t respond to Snap Points.
Stretching Elements
The Stretch Tool is an option of the Adjust menu
When you activate the Stretch Tool, interactable Stretch Points appear around Elements. Pinch and drag these stretch points to stretch an Element in the corresponding direction!
Grouped Elements are not eligible to be stretched. Remove the Element from the group first before stretching.
Copying Elements
The Copy Tool is an option of the Adjust menu
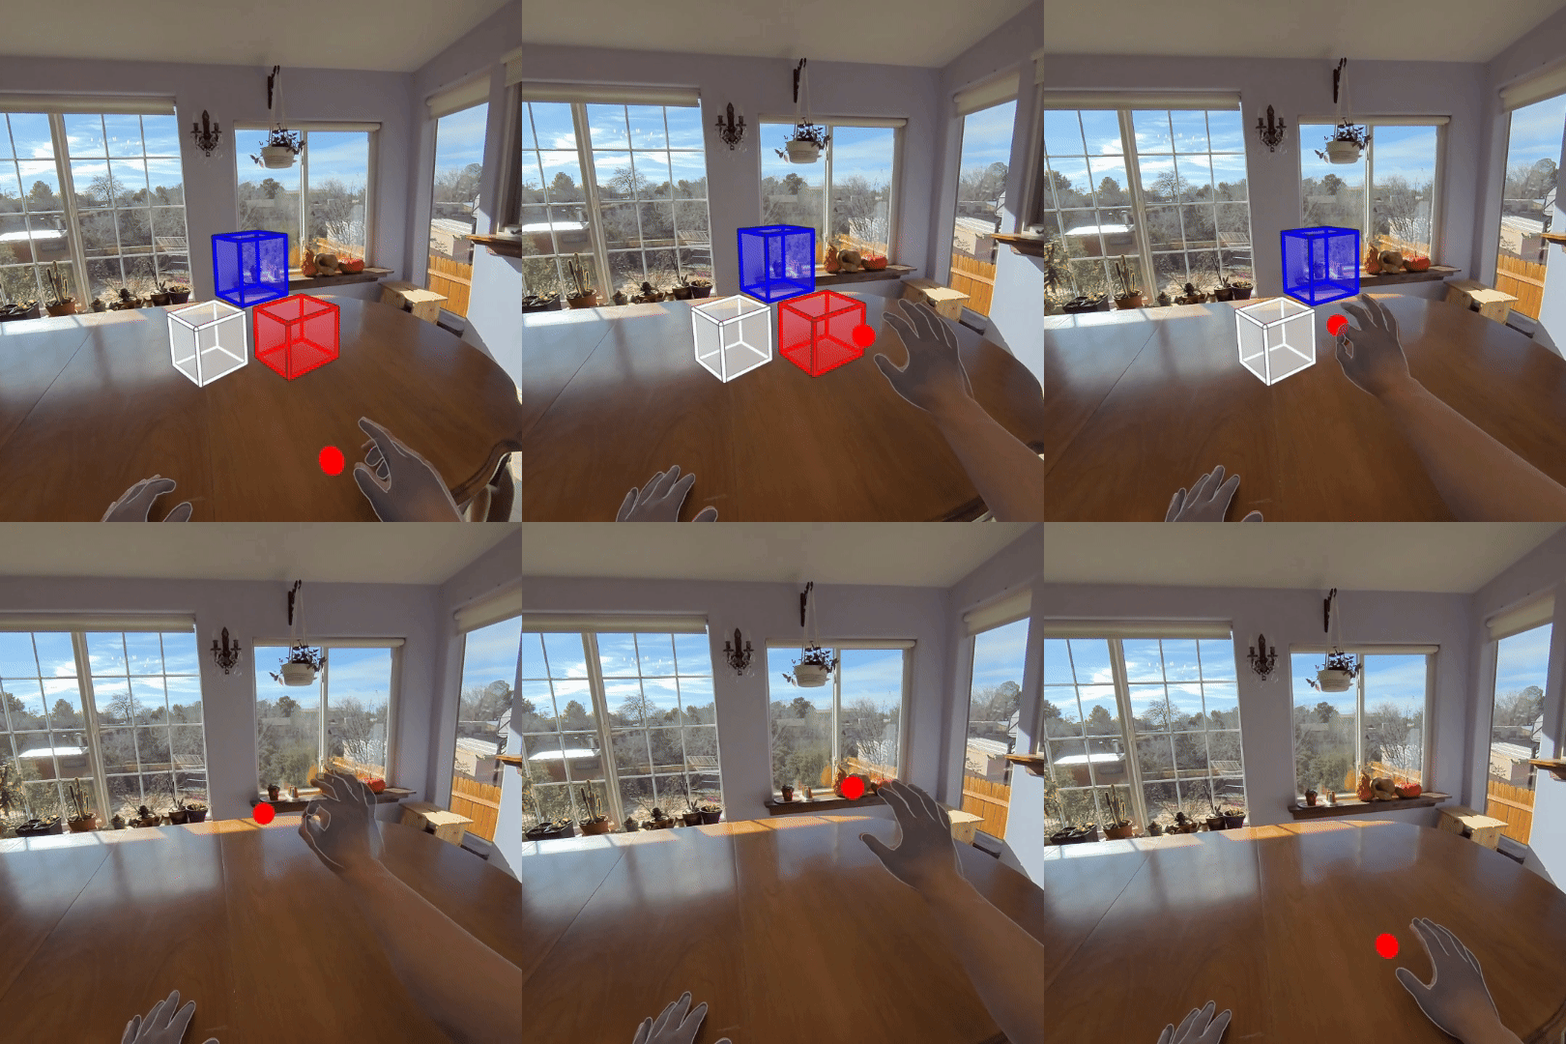
When the Copy Tool is active, a small interaction point appears near your active hand. Pinch and drag an existing Element (or Group) to create a copy of it!
Deleting Elements
Activate the Delete Tool to delete. A quick pinch will delete only the single highlighted Element. Groups are deleted as a single Element.

Alternatively, pinch and drag to delete any Element that touches the delete radius.
The Undo Button
The Undo Button will allow you to undo your actions one-by-one.
Note, when sketching collaboratively, you can only undo your own actions. If another person interacts with an Element, the undo history is cleared up to the point that they claimed it.
Setup and Calibration
Saving & Loading Spaces
Load, Rename, and Delete saved spaces in the Hamburger Menu.
All of your spaces are automatically saved. Note, the name defaults to the date & time it was created).
When loading a saved space, there is a pretty good chance that all of the Elements will load in exactly where they were before. However, always make sure to Calibrate Your Space before you close it. This will ensure that Elements will be positioned correctly if you need to recalibrate at a later date.
Saving & Loading Elements
Save and load collections of Elements in the Hamburger Menu under the ‘Objects’ tab.
Use your hand or controller to highlight Elements that you want to save, then pinch and drag to add those Elements a saved Object. A preview of the collection will appear in the menu. You can click this preview button to spawn a copy of that Element collection back into your space or any future spaces you join!
Using COCO 3D Together
To sketch collaboratively, go to the Hamburger Menu and view the list of ‘Nearby Spaces’. When someone else using COCO 3D is nearby and connected to the same local network as you are, their current Space will appear in this list. Click their Space to join them!
Check out the Calibrating Your Space guide for a full description of the calibration system.
Once there are multiple people connected to the same Space, the host must make sure that everyone has calibrated their Space to match. You’ll know when your calibration matches up because the COCO 3D logo will appear centered above their head!
Calibrating Your Space
Calibrating a Space involves picking two points in the real world to align the virtual coordinates in your headset with the physical space around you. Calibration is also necessary for reliably loading a Space after it has been closed and for Using COCO 3D Together.
If you’re just doing a quick sketch by yourself, you may not need to calibrate at all!
You can access Calibration by activating the Calibration tool in the Tool Menu. If you are the owner of a Space, you must be the first person to add calibration to it.
When you press the ‘Add Calibration’ button, pinch and place two points in your environment. Make sure to place the points at easy-to-reach, easy-to-remember, and relatively permanent features of your real space. Good candidates are corners of furniture or clear patterns on the floor or walls.
When you reload your Space, or if it ever becomes misaligned with the real world, all you need to do is select the same two points in the same order. Your space will reorient itself.
Each additional user who joins your Space must pick the same two points in the same order. This will ensure you can sketch together properly.
Scanning Your Room
COCO 3D supports the Meta Quest room scanning feature, allowing you to integrate a digital scan of your physical space directly into your COCO 3D workspace.
If you've already performed a room scan on your Meta Quest device, your existing scan will automatically appear under the 'Meta' tab within the Hamburger Menu.
If you haven't yet scanned your room, you can easily start a new scan through the same 'Meta' tab. Once your scan is complete, you'll have two options:
Automatically generate and add all detected Elements from the scan into your COCO 3D space at once.
Individually select specific Elements by aiming at them and adding each one separately to your space.
Spatial Anchors
COCO 3D uses a mesh of delegated-authority spatial anchors in order to improve the positional stability of its Elements in the real world. Hopefully you never have to mess with this feature yourself, but if you do, you can find it in the Calibration Menu. If you start noticing that your Elements are jumping around, you can try clearing your saved spatial anchors by hitting the red ‘ERASE’ button on the spatial anchor panel in the Calibration Menu.
